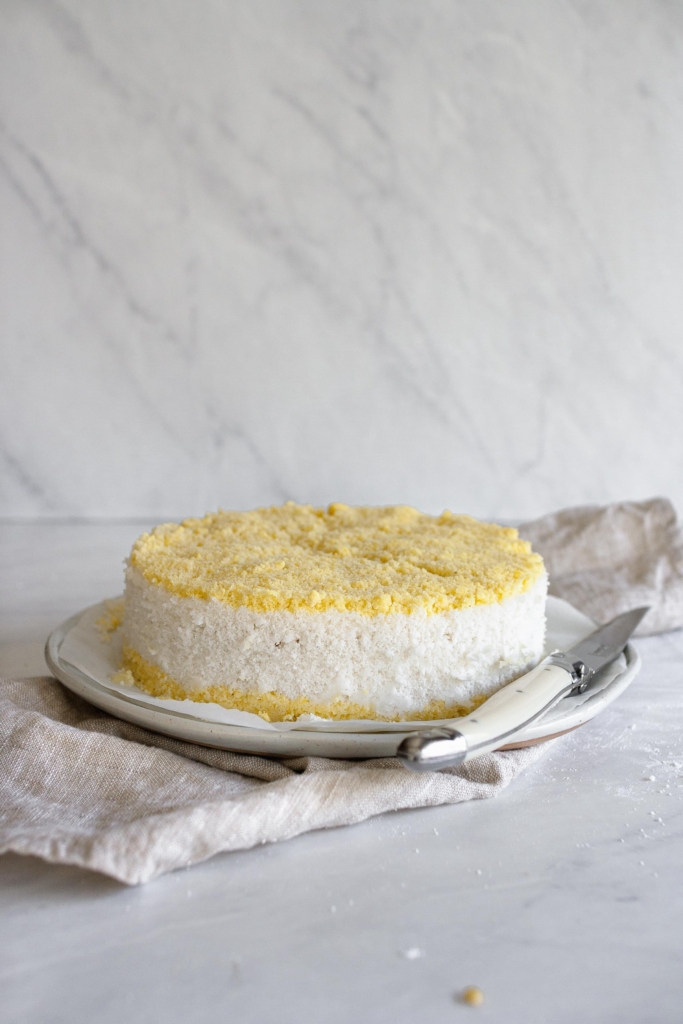
A steamed Korean rice cake filled with kabocha squash or Japanese pumpkin and covered with a slightly sweet mung bean crumble.
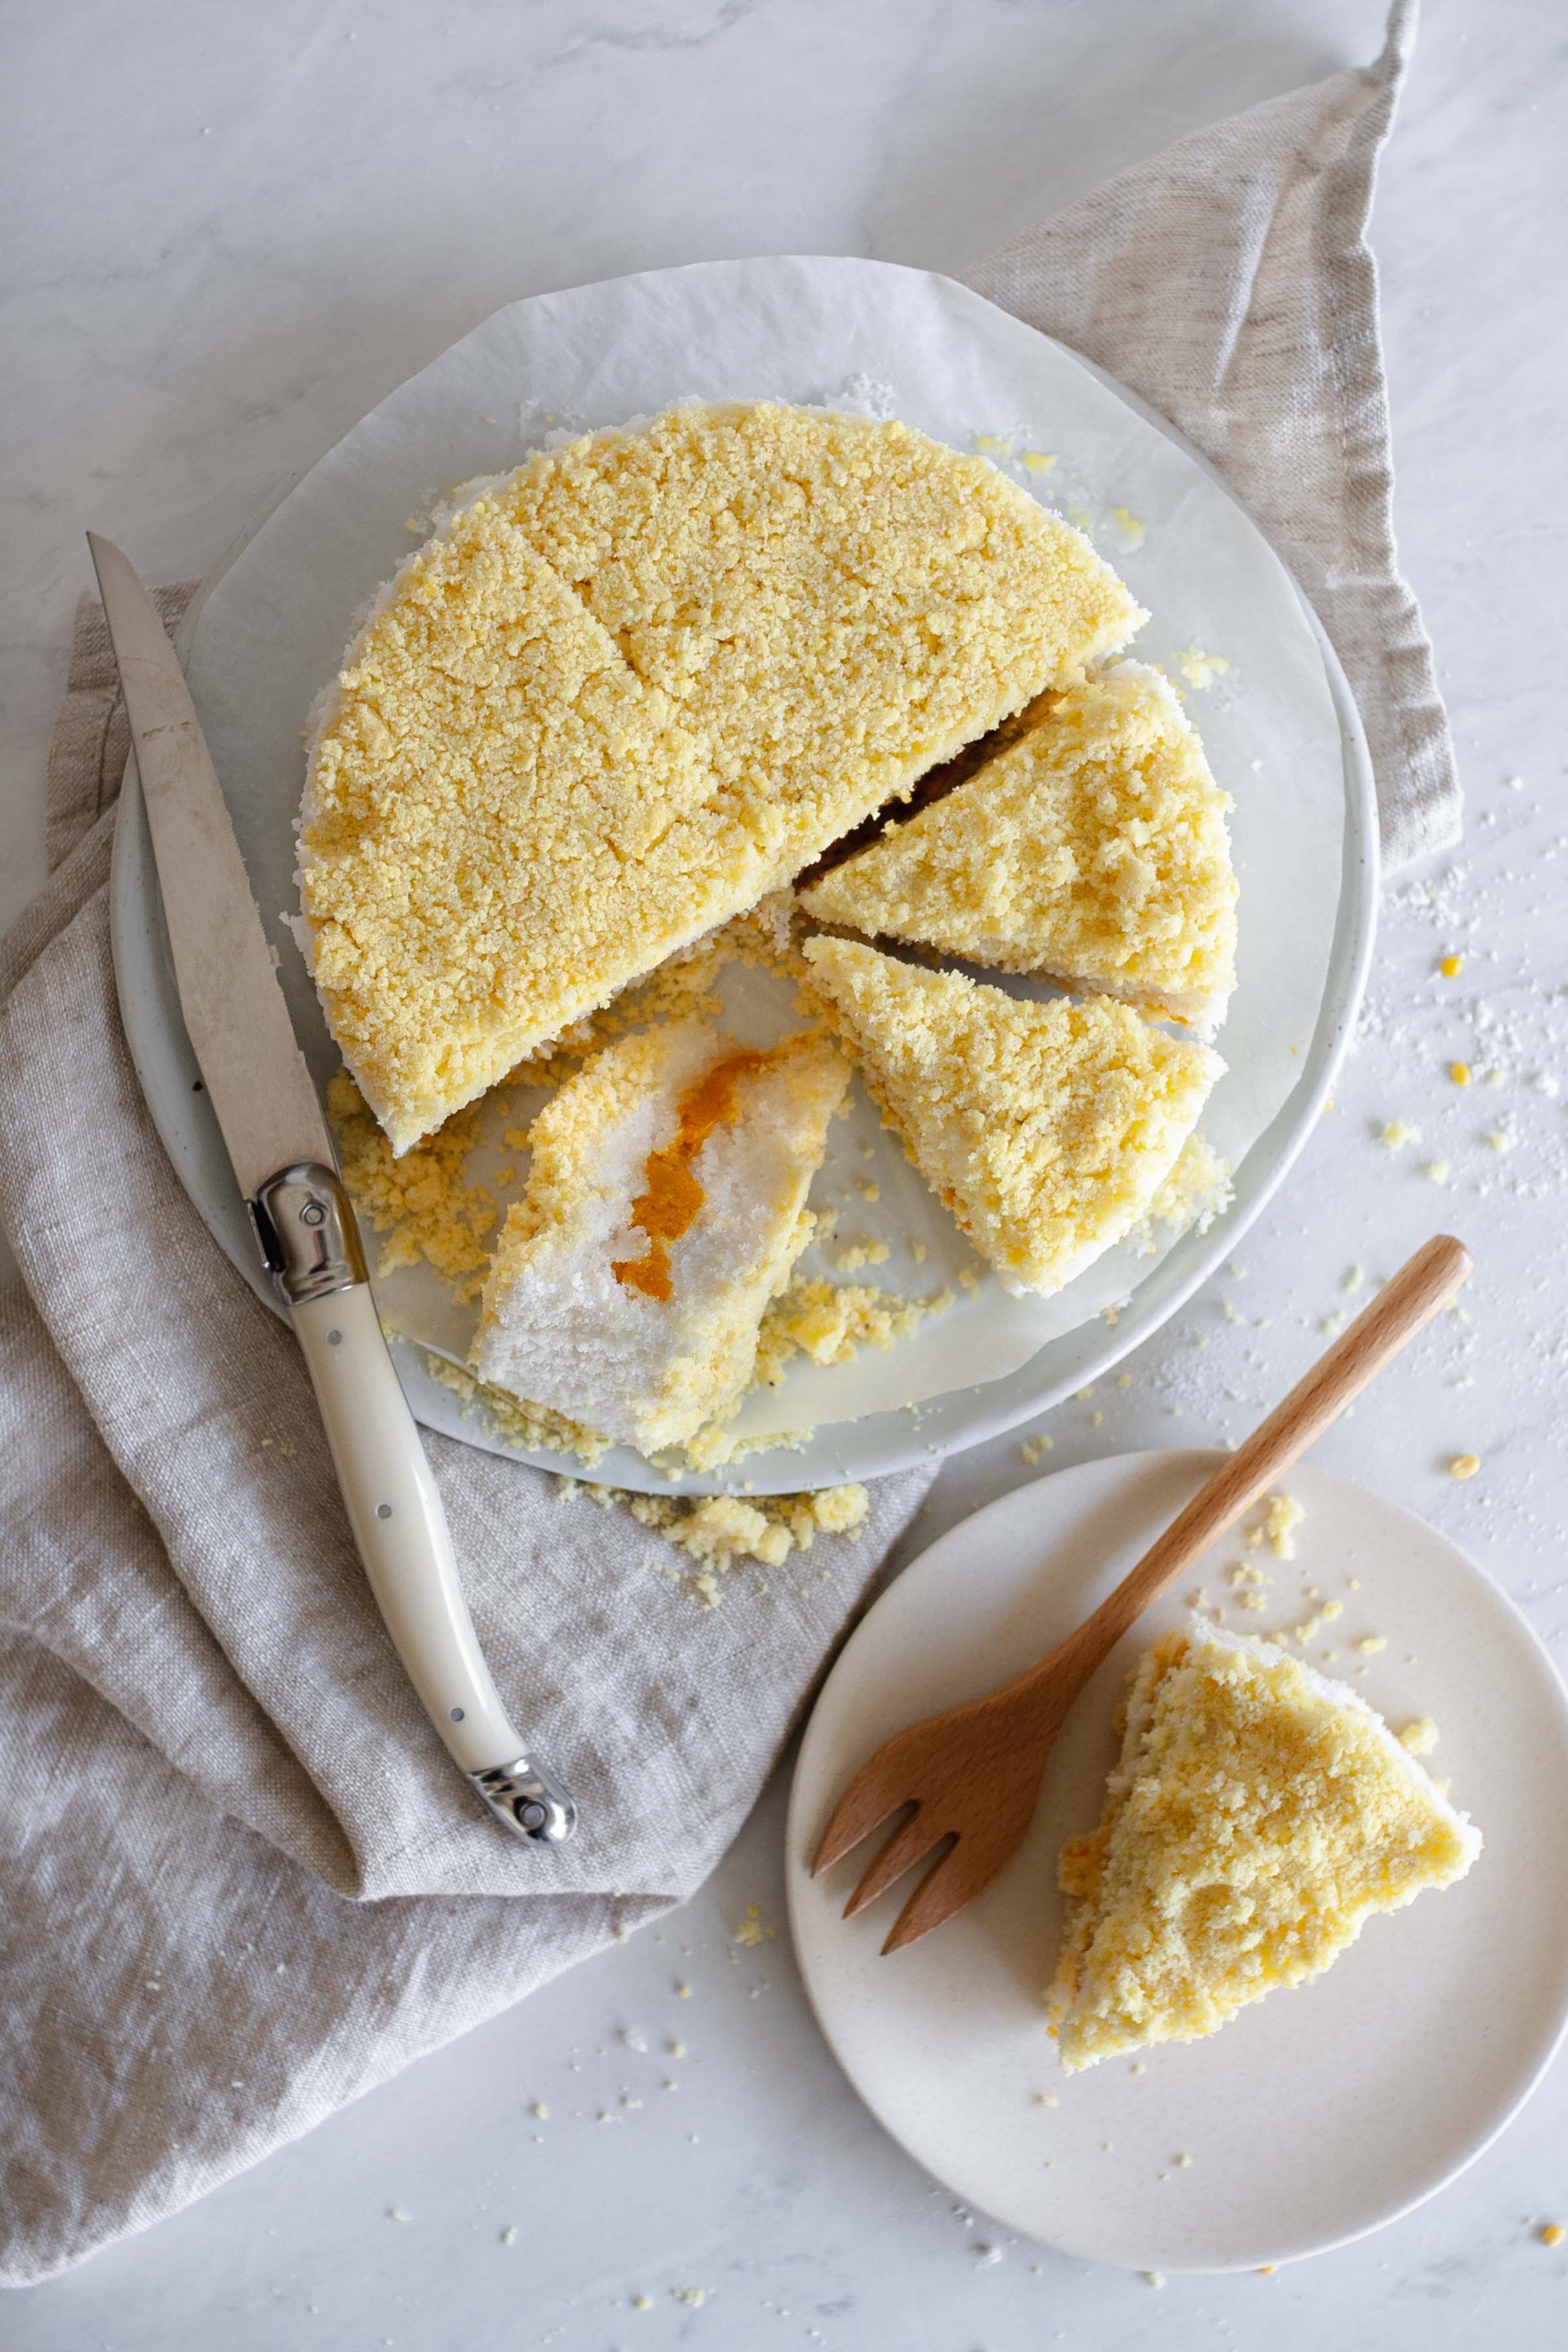
Over the summer, I started experimenting with making Korean rice cakes from scratch. I’ve always wanted to challenge myself with learning how to mill my own rice flour and figure out the perfect steam, but never got around to it. Being at home with little to no social obligations seemed like the perfect time to tackle this endeavor!
Making rice cakes from scratch requires time, effort, and specific equipment–which sounds daunting–but the good news is that it’s not incredibly difficult and quite doable even for those with less experience in the kitchen.
Why make rice flour from scratch? Can’t I just buy it at the grocery store?
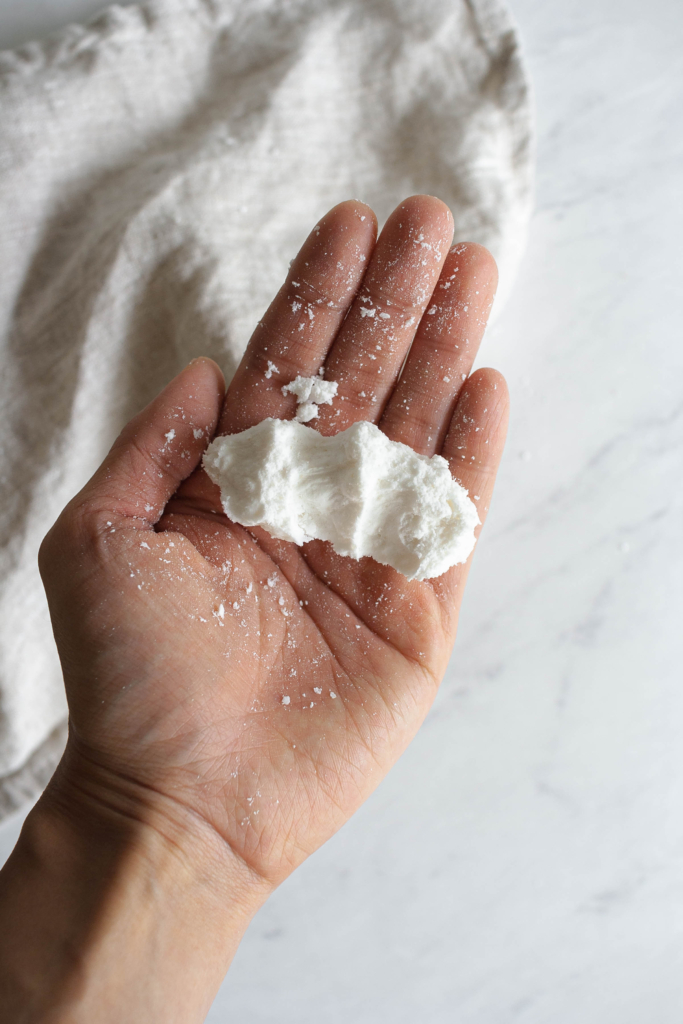
Rice flour, or mepssalgaru, 멥쌀가루, used in Korean rice cakes is different from the commercially milled ones you find at a regular grocery store. Regular rice flour is made by grinding dry grains whereas rice flour for rice cakes is made by grinding soaked grains. The resulting flour has a little bit of moisture, which means that it needs to be stored in the refrigerator or freezer. You can actually buy this type of rice flour at some Korean grocery stores or rice cake shops (usually in the freezer section), but you won’t find it at a typical American store.
What kind of equipment do I need to make my own rice flour?
I found that the best way to grind the flour was to use both a food processor and a high powdered blender, like a Vitamix. The food processor alone didn’t produce flour that was fine enough, and using just the Vitamix took too long and ended up feeling a bit more labor-intensive because the grains kept getting stuck. By processing the rice into a rough grind first with the food processor and then running it through the Vitamix, I was able to get the grind that I needed without breaking too much of a sweat (although it does require a few more dishes that need to be washed).
Along with a food processor and high powdered blender, you also need a sieve, preferably one that has medium to medium-small holes. It’s totally fine to use a sieve that’s very fine, but that just means it’ll take longer to get everything sifted.
Any special equipment I need to steam the rice cakes?
In order to steam the rice cakes you need a pot, steamer basket, and cheesecloth or muslin. For the steamer basket, I personally like using bamboo ones that sit on top of the pot instead of inside. I find that the steam is easier to see and control with this kind of steamer basket.
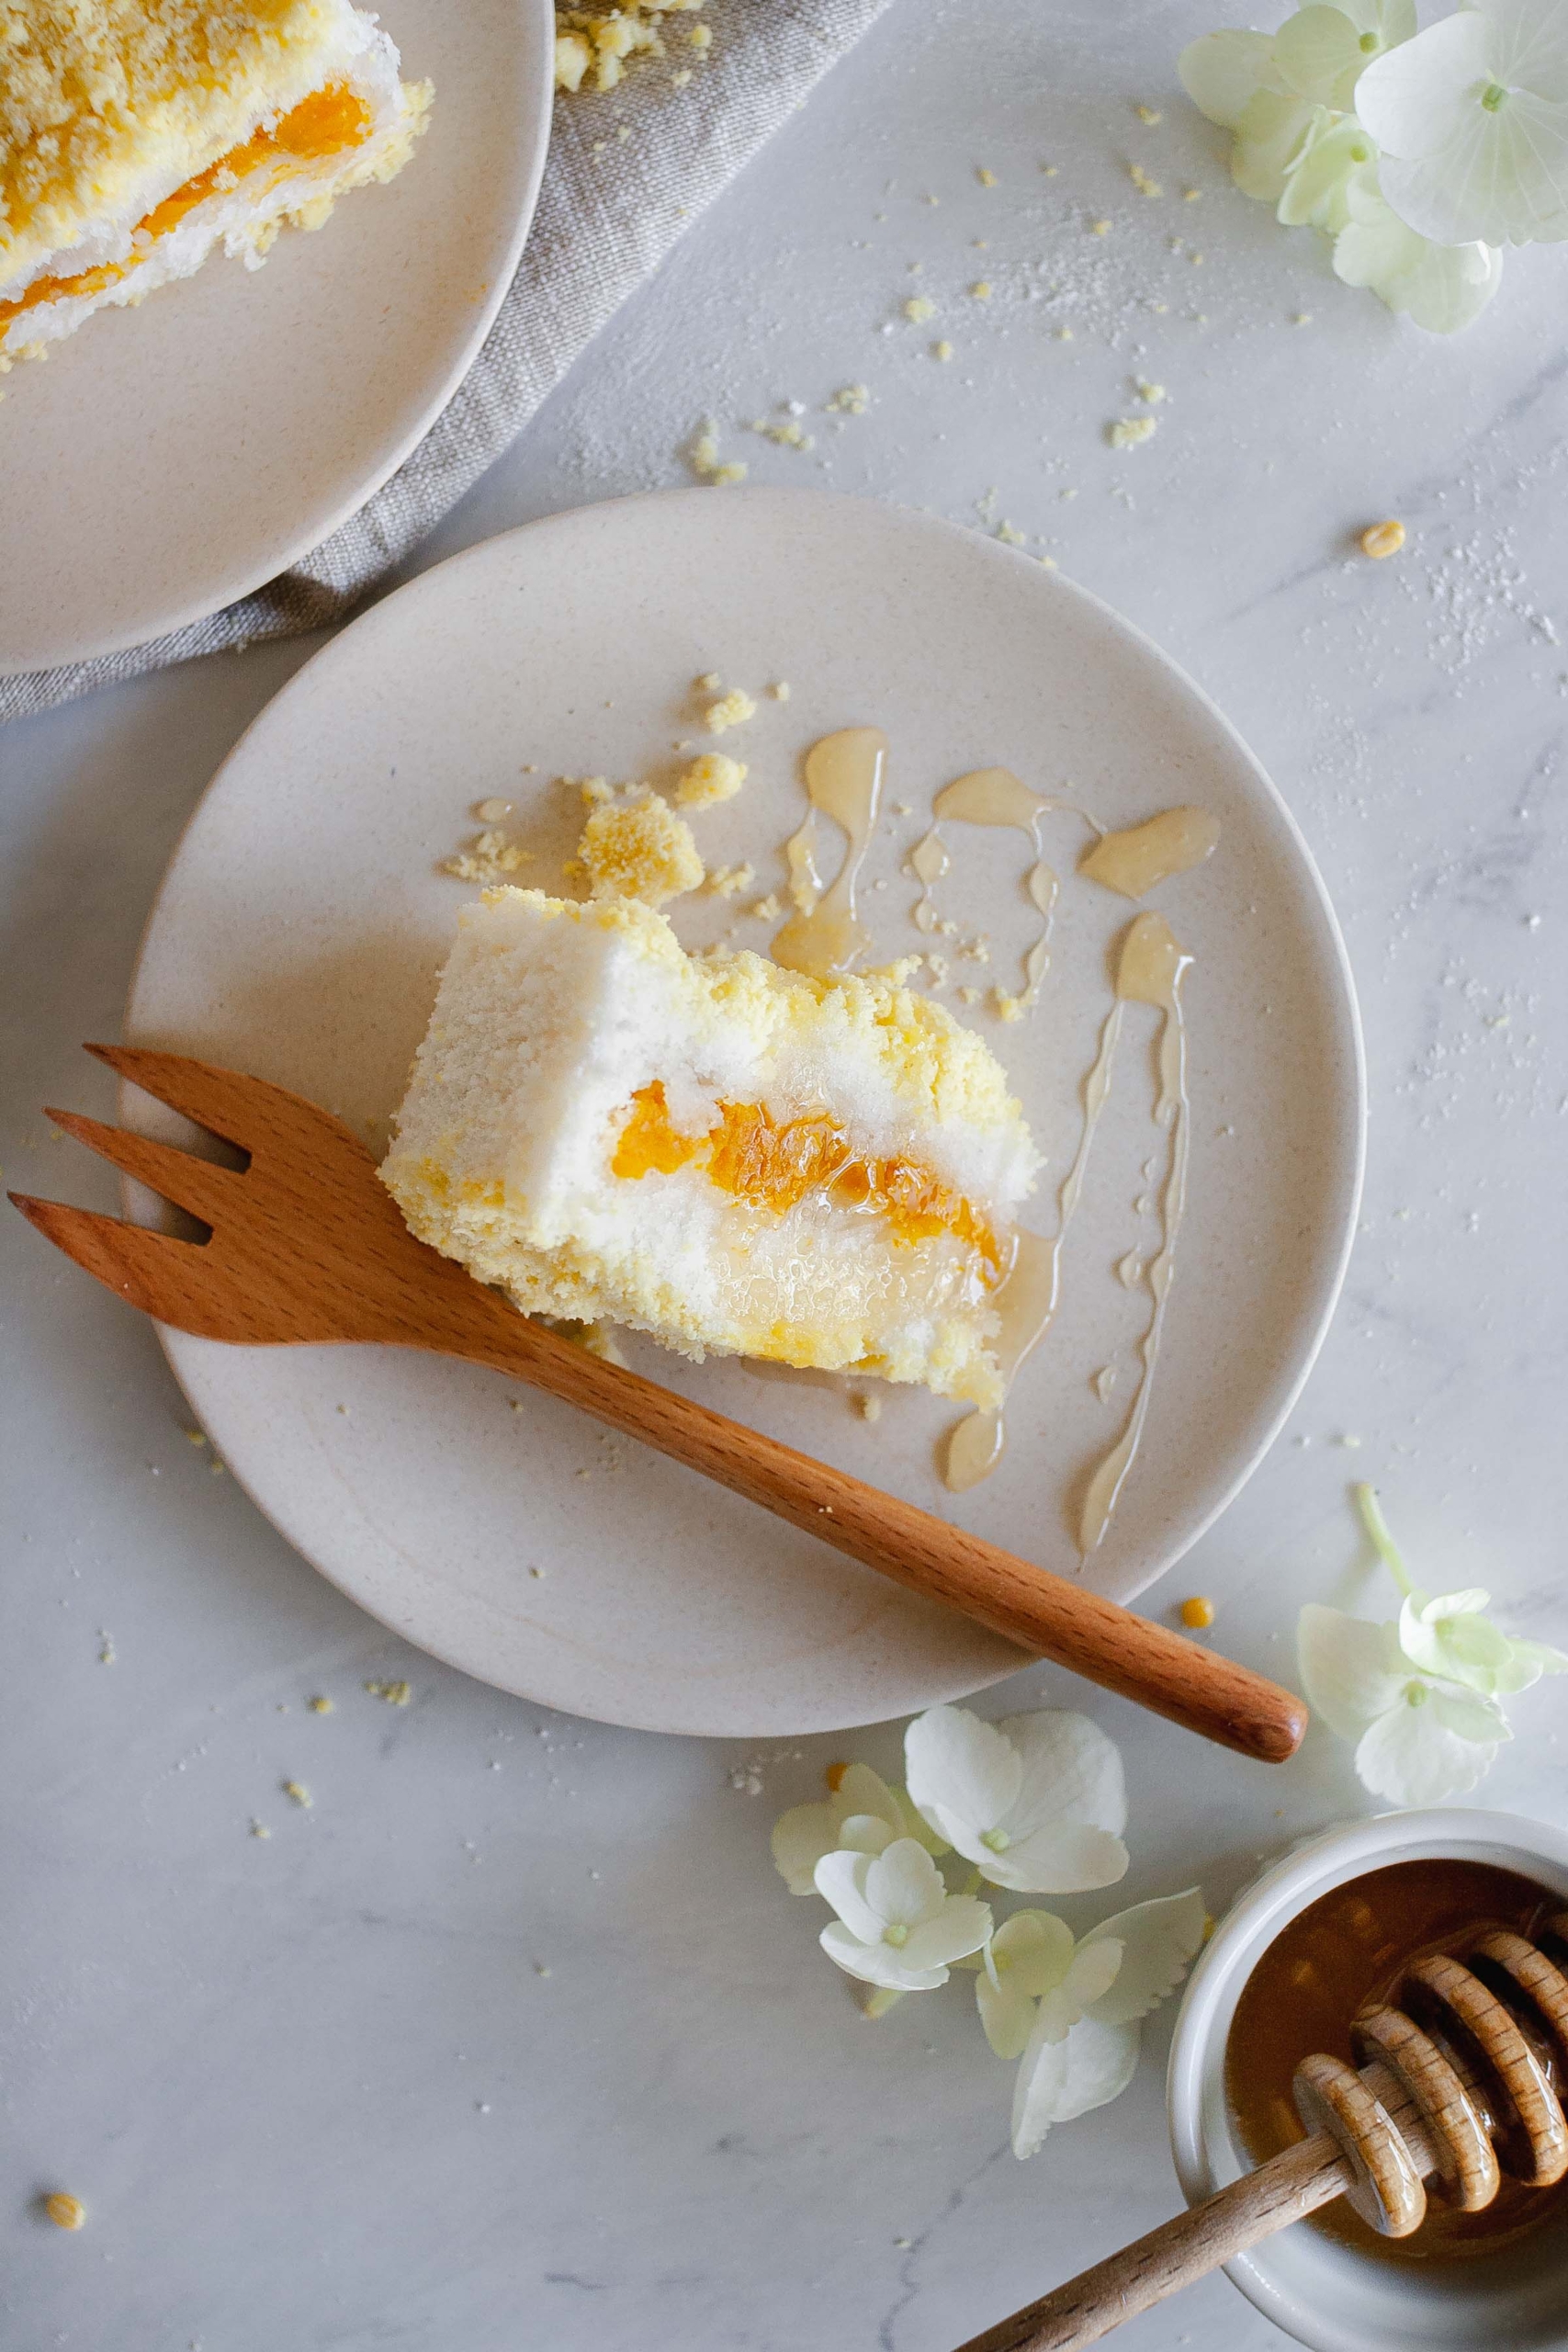
It’s been a lot of fun learning how to make my own rice cakes, and it’s been empowering to know that it’s possible to do it from scratch at home. There are SO many different types of rice cakes that I feel like my journey into the rice-cake-dome is just beginning. So far I’ve only experimented with rice cakes made with short-grain rice flour, but I’m hoping to tackle glutinous rice flour as well in the near future. Will keep you posted!

In the meantime, I hope you give this recipe a shot and tackle making your own rice cakes from scratch. The extra effort and time is truly rewarding and worth it!
More Korean rice cake like recipes:
Mochi Bread Bites with Black Sesame & Roasted Bean Powder aka the Cheater’s Injeolmi
Korean Sweet Rice Dessert, Yaksik, 약식

Korean Pumpkin Rice Cake with Mung Bean Crumble, Nokdu Hobaktteok, 녹두호박떡
- Total Time: 4 hours including soaking time
- Yield: 6 to 8 servings
- Category: Dessert
- Method: Steaming
- Cuisine: Korean
Description
A steamed Korean rice cake filled with kabocha squash or Japanese pumpkin, and covered with a slightly sweet mung bean crumble.
Ingredients
Mung Bean Crumble, 녹두고물
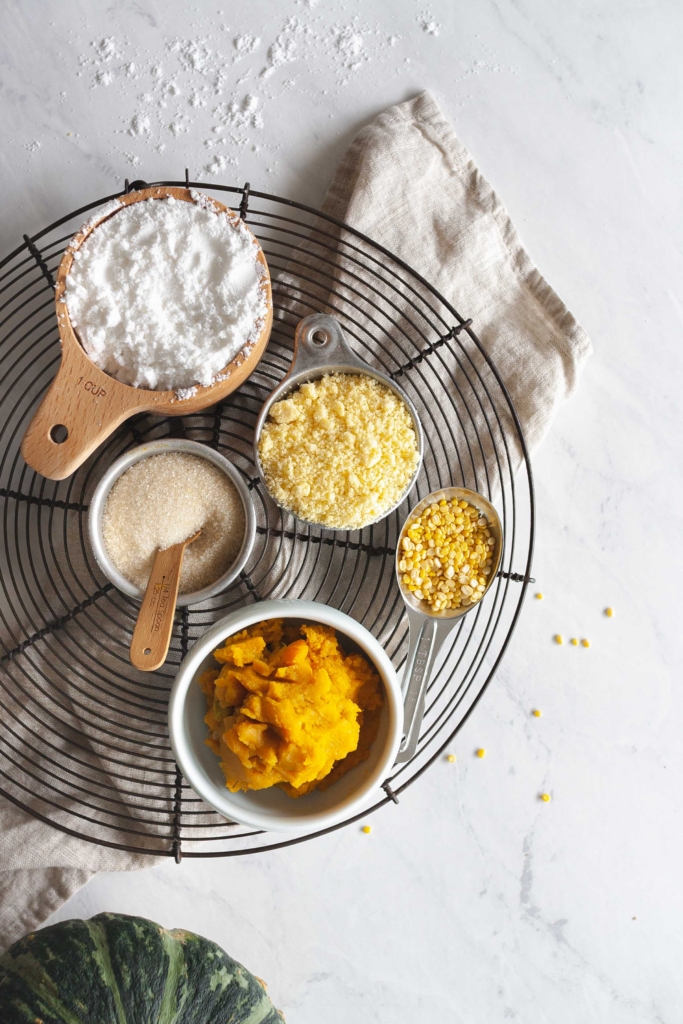
1/4 cup (55 g) split mung beans, dried
3/4 teaspoon (2.25 g) salt
1 teaspoon (4 g) sugar
Kabocha Squash or Japanese Pumpkin Puree or Slices
About 1/4 kabocha squash
Korean Pumpkin Rice Cake
2 cups (240 g) rice flour, mepssalgaru, 멥쌀가루 (see below for recipe)
2 1/2 tablespoons (30 g) sugar
2 tablespoons (30 g) water
1 cup (about 110 g) mung bean crumble
1/2 cup (about 130 g) kabocha squash puree or 1/4 whole kabocha squash sliced
Instructions
Mung Bean Crumble, 녹두고물
1. In a medium-small bowl, cover the dried split mung beans with water (make sure the water comes up about 3 inches above the beans). Soak for 2 hours, then drain.
3. Prepare a pot and a steamer basket. Pour a few inches of water in the pot and bring to a boil. Wet a cheesecloth or a muslin cloth and place on the steamer basket leaving enough fabric hanging over the sides. Place the soaked mung beans on the cloth, and use the overhanging fabric to cover the top.
4. Carefully place the steamer basket inside the pot and place the pot’s lid on top. Steam for 20-25 minutes on medium to medium-high heat. Once the beans are soft and are easily crushed between your fingers, removed from the pot and cool.
5. Once cool enough to handle, place in a mini food processor with the salt and sugar and pulse until a rough crumble is formed. Alternatively, the mung beans can be crushed with the side of a rolling pin or using a mortar and pestle. Set aside until needed. The mung bean crumble can be made 1-2 days in advance and kept in the refrigerator or can be kept in the freezer for 3 months. Bring to room temperature before using.
Kabocha Squash or Japanese Pumpkin Puree or Slice
1. Cut the kabocha squash into quarters and remove the seeds.
2. Prepare a pot and steamer basket. Pour a few inches of water in the pot and bring to a boil. Put one of the kabocha squash quarters in the steamer basket and place the steamer basket inside the pot. Cover the pot. Steam on medium to medium-high heat for about 20 minutes. Once the kabocha squash in soft, remove from the steamer basket and cool.
3. Once the kabocha squash is cool, peel, and mash the flesh using the side of a rolling pin or a mortar a pestle. The puree can be rough with a few chunks. The kabocha squash puree can be made 1-2 days in advance and kept in the refrigerator or frozen for 3 months. If frozen, make sure to defrost completely in a sieve to remove any excess water.
4. Alternatively, peel one of the raw kabocha squash quarters and cut into 1/8 inch or 3 mm thick slices.
Korean Pumpkin Rice Cake, Hobaktteok, 호박떡
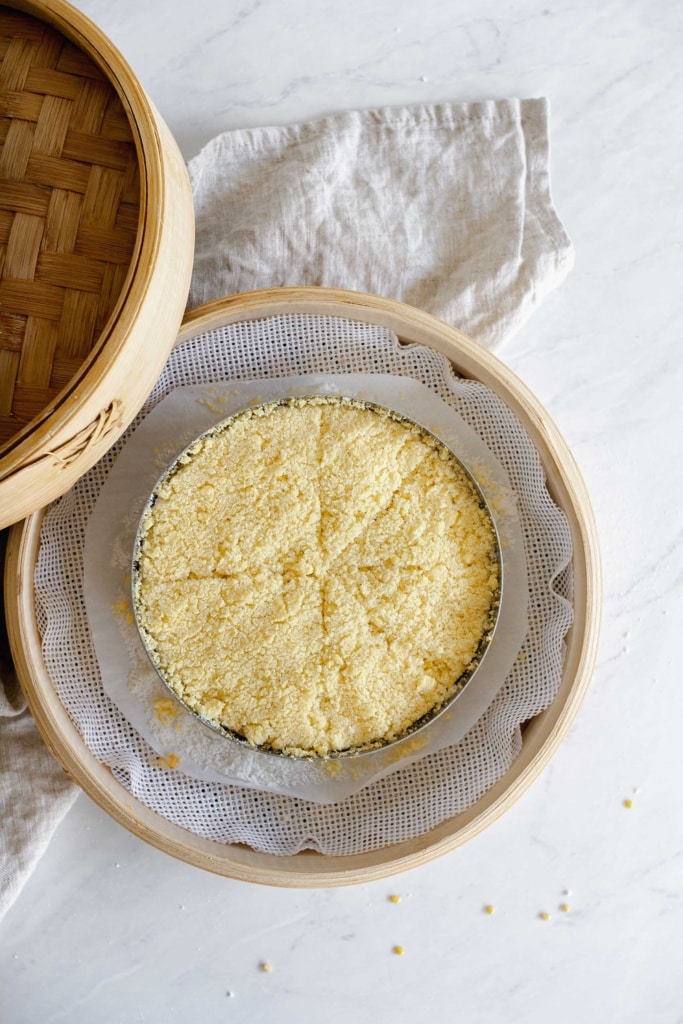
1. Prepare a pot and steamer basket. Pour a few inches of water in the pot and bring to a boil. Line the steamer basket with parchment with holes cut out throughout. Get a 6 inch round cake ring, or mold of similar size, and brush the sides with oil.
2. Pass the rice flour through a medium sieve. Then mix in the sugar. Add the water and incorporate with your hands. The mixture should feel moist but not soaking wet. It should hold together when balled in your hand, and then crumble after a few bounces in your palm.
3. Place the ring mold onto the parchment-lined steamer basket. Sprinkle half of the mung bean crumble evenly in the bottom of the mold. Then add half of the rice flour mixture on top. Be gentle with the rice flour, making sure to keep things airy and not compact. Place all of the kabocha squash puree or slices on top in an even layer. Then top with the rest of the rice flour. Finally, sprinkle the remaining mung bean crumble on top. Use a bench scraper or similar took to make sure the top is level and flat.
4. Cover the prepared rice cake with the steamer lid and steam for 18 minutes on medium to medium-high heat. Turn the heat off and let sit, covered for 4 minutes, then remove from the pot, uncover, and cool.
5. Can be enjoyed warm or at room temperature with honey (optional). Store in an airtight container in the refrigerator for 5 days or in the freezer for 3 months. Reheat in the microwave with a sprinkling of water or in a steamer basket.
Keywords: korean pumpkin rice cake, mung bean crumble, nokdu, hobaktteok, kabocha squash, rice cake, 호박떡, gluten free
Rice Flour, Mepssalgaru, 멥쌀가루
- Total Time: 7+ hours, including soaking and draining time
Description
A DIY recipe for making Korean rice flour from scratch.
Ingredients
5 cups (800 g) short grain rice
1 tablespoon (9 g) salt
Instructions
1. Wash the rice and cover with at least 3 inches of water. Soak for at least 5 hours or overnight.
2. Strain the rice using a sieve and let it drain for at least 30 minutes.
3. Using a food processor, grind the soaked and drained rice as finely as possible.
4. Grind a second time using a high powered blender, like a Vitamix, to get a finer grain. Blend about 1 to 1 1/2 cups at a time to prevent the rice from getting stuck.
5. Pass the flour through a medium holed sieve. Grind any big pieces that don’t pass through the sieve again with the blender, and pass through the sieve.
6. Use the flour right away, or keep in an airtight container in the fridge for 1 week or the freezer for 3 months. Bring to room temperature before using.
Keywords: rice flour, korean rice cakes from scratch, mepssalgaru, 멥쌀가루
Belle says
What is the 1 cup of mung bean powder in the recipe? Did you mean the mung bean crumble?
Jessica says
Belle- Yes! It’s 1 cup mung bean crumble not powder. Thanks for catching that!